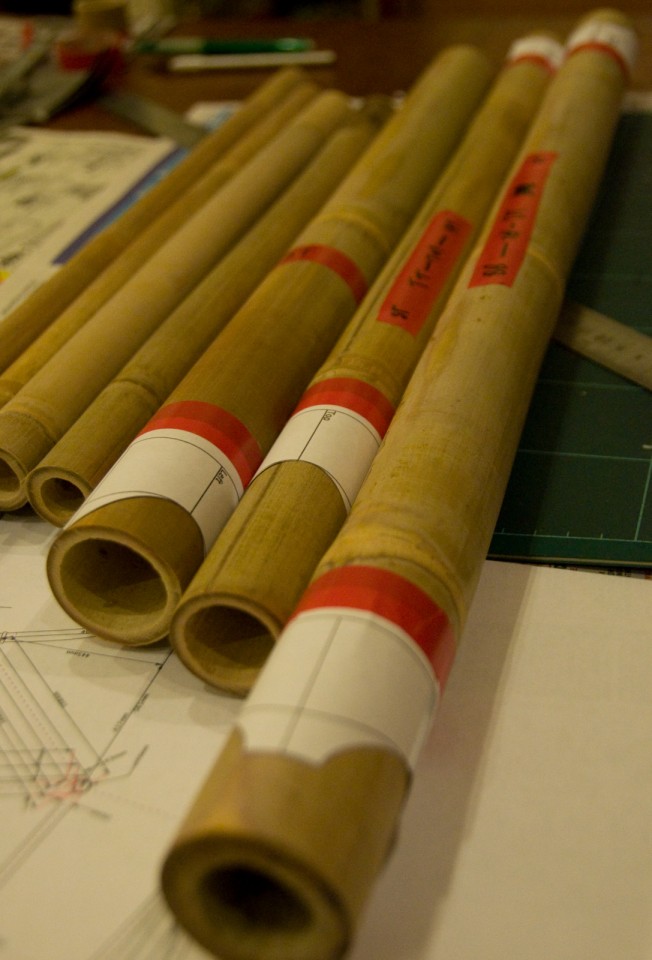
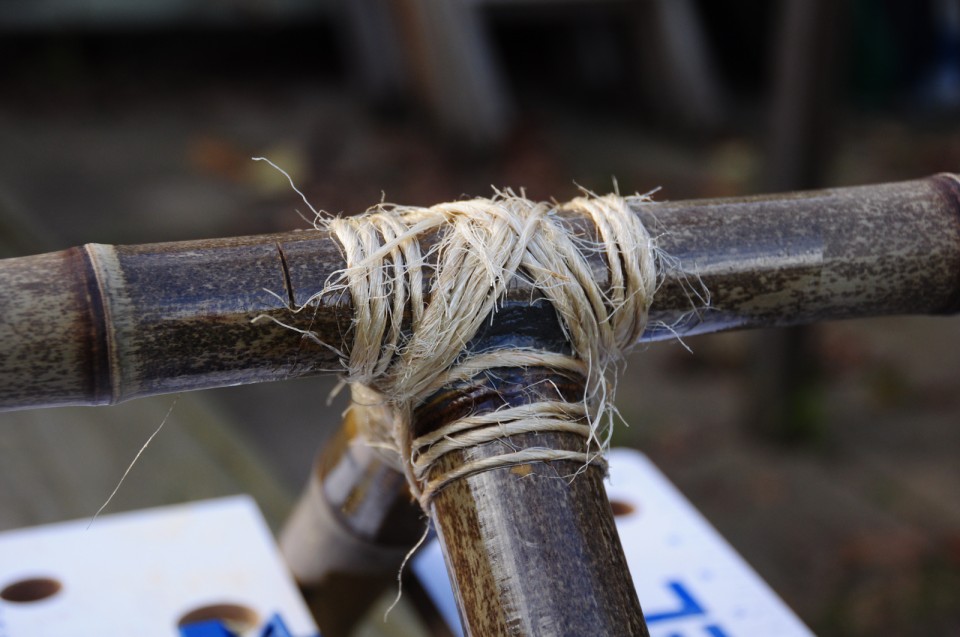
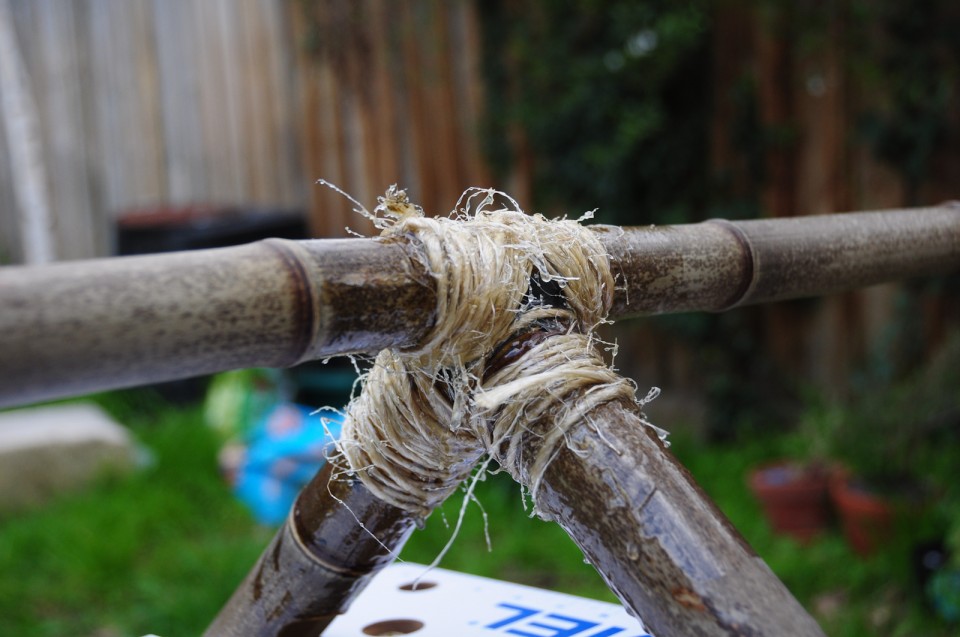
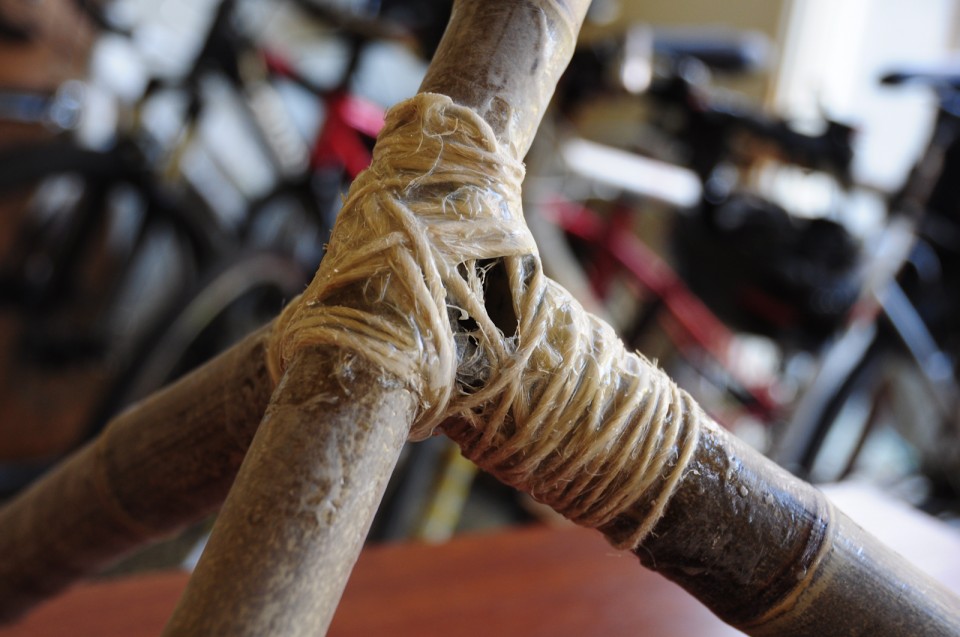
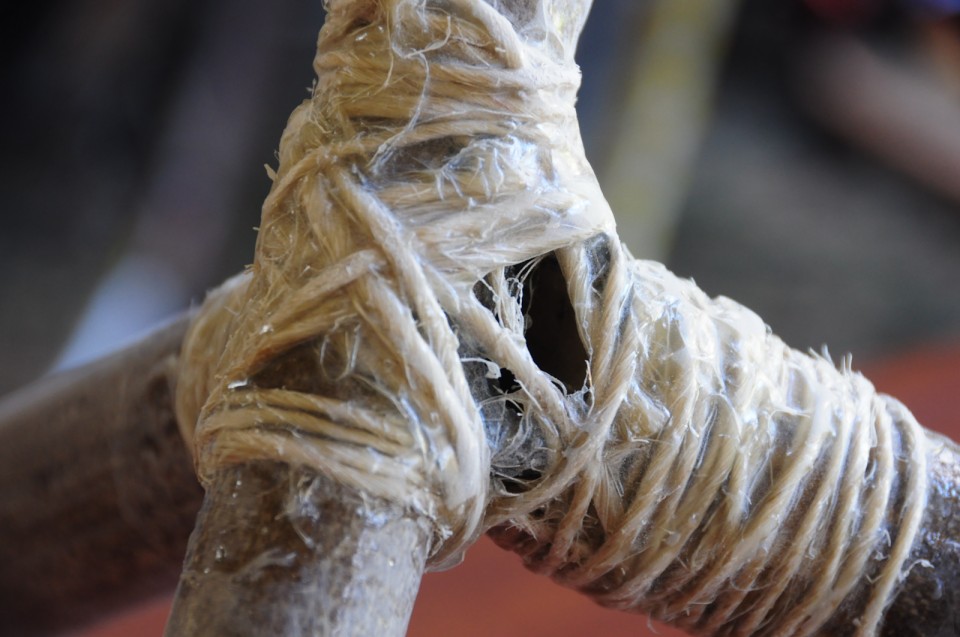
Sanding back

Today I’m sanding back the tack epoxy to a smooth finish. I figured I probably shouldn’t have used as much epoxy for this stage as it’s not very strong, due to the micro-fibre filler that’s added to make it more paste-like. The final wraps will use undiluted epoxy along with sisal twine and should be the main force-bearing layers.

It’s messy work sanding this stuff back. You need to wear a mask as the un-cured epoxy is still toxic. Only after it’s properly cured, which takes 4-5 days is it harmless.

Tacky

So it’s taken approximately 3 months but I’ve finally tacked together my first frame!

Here’s the process from start to finish:

Surface preparation

I roughen up the bamboo by using the edge of a Dremel sanding wheel. For the steel I sandpaper first with 80 grit, then follow the same sort of deal as with the bamboo. This will provide more surface area and texture for the epoxy to key into.

I then coat the steel parts in a thin layer of pure epoxy and set them aside to get tack-dry.

Tack glue

Starting with the chainstays, I fill the rear end with epoxy and then squish onto the threaded rod I’ve attached to the drop outs. I then position the bottom bracket and stick the other ends of them to that (forgetting to sand back the epoxy on the BB… oops!?). Next comes the seat-post and the down-tube. The glue’s pliant for about 30minutes so it’s pretty easy to move stuff around if you make a mistake.

I then go to the pub for dinner and a few beers with mates while these parts take hold.

Upon returning and checking that all is well I then attach the head-tube to the down-tube, along with the top-tube to the seat-tube. The angles of the head-tube won’t be exactly 72°, but it’ll be close enough I’d say. I really need a jig that holds the head-tube in place!

Finally it’s the attaching the seat-stays to the seat-tube. Proving harder than it should be I find out that they’re not exactly even in length. I make a few adjustments and compromises on the seat-post angle and set them anyway. If it’s wonky in the morning I can always cut thru the epoxy and try again. Fingers crossed I won’t have to!

Let’s set something straight.

Sharks with frickin’ lasers. That’s what I’m talking about. Ok, well minus the sharks. It’s more like jigs with frickin’ lasers. Close enough. Check out the hi-tech laser-level action below.

The mitres are all done, so now it’s a matter of setting my somewhat cumbersome frankenstein of a jig (can someone buy me a gift voucher for Maytec please?) into place for each pole. I’ve made a series of height adjustable stand-offs to hold up each piece as well as come conical shaped rubbers from some chair legs for the head tube placement. It’s all a bit too dependent on the table being level thou, making it quite painstaking to set.

With any luck I’ll have it all set tonight. Then it’s on to roughing everything up so epoxy will stick to it. Good times.

Mitre’s well show you

Here’s the results of today’s mitreing. Pretty happy with the results so far. Just have the top tube to go and then into the more finicky work of the rear triangle. The main thing I learned today is that getting both sides of the mitres straight and level (ie. so the BB sits at exactly perpendicular) is much more important than getting the curves right. Sure getting the curves right is a good thing too, but it’s ok if there’s small gaps as it will allow the epoxy to fill into the inside of the tubing and strengthen the join.

Choosing the bamboo for your frame

This might seem obvious, but choosing the exact bits of bamboo you’ll use for your bike frame is one of the most important things to do in the frame building process. You need to know a lot of stuff before you can choose the right bits thou! Read on for a few pointers I’ve picked up along my bamboo selection journey.

So you’ve got your geometry right and you know what lengths of each bit of bamboo you need. So off to the shop/woods right? Wrong! You’ll need to know what diameters suit which bits of the frame and then work within a set of tolerances that you know won’t cause problems (or be willing to fix those problems in creative ways!).

The rear chain-stays are by far the hardest bits to work with, followed closely by the seat-stays, then seat-post. The top and down tubes are fairly open to how much trust you have in the strength of bamboo. You could go for skinny poles if you want a retro steel looking frame, or fat chunky one that might weigh a bit more, but are probably stronger, like on an aluminium or carbon frame.

The main problem areas (and questions to find answers to) are:

  1. Tyre clearance – what’s the widest tyre you want to put on your frame?
  2. Chainring clearance – how many chainrings? How many teeth?
  3. Crank-arm clearance – what’s the Q-Factor (width) of your cranks?
  4. Seat-post – what diameter and length will you need? Are you going to use a metal sleeve inserted into the bamboo for the seat-post to go in?
  5. Disc rotor clearance (if you’re using them) – how big are the rotors?

Only once you’ve got all those questions solved are you then ready to go in search of bamboo with the right diameter!

A rough diameter guide

The figures below are a rough guide to what you might need for a road or cyclocross frame. The figures in brackets are what I’ve used on my first frame.

Top tube: 26-36mm (35mm)

Down tube: 35-45mm (41-43mm tapered)

Seat tube: 40mm (the inner diameter needs to be more than the metal sleeve, which if you’re using a 27.2mm seat-post is around 30mm)

Seat stays: 20-25mm* (22mm)

Chain stays: 20-25mm* (25mm)

*Tyre and chainring clearances end up being very precise things, so try to find bits that will exactly match your spec.

What to look for in choosing your bamboo.

So you know what diameters you need. What else is important in your bamboo selection process?

Nodes

I still can’t find out decisively if nodes are strong or weak points in bamboo. Books tell me one thing, the internet tells me others. It’s confusing. If anybody has any definitive information on node strengths & weakness please let me know. What I think is right is that they add strength from crushing forces, but cause weakness from bending forces.

Wall thickness

Bamboo varies wildly in wall thickness from species to species, and due to its tapering nature will often be thick at one end and thin the other. Use the thick ends for areas of your frame you think will be under lots of force I guess. Where are those areas? All over the place!

Straightness

They don’t have to be dead straight, but my feelings tell me that any bends and kinks in bamboo will only make it weaker and more likely to fail when put into the triangle formations of a frame. A triangle with a bent side can easily be crushed!

Roundness

Bamboo is often not round! Lots of the pieces I’ve dealt with are quite oval shaped. This can be a good thing. Oval shapes provide more strength in certain directions. Use them on chain-stays and down tubes to your advantage.

Defects

Wood borers seem to love bamboo and often you’ll find pieces with trails left by these little critters. Most of the time they just eat the surface “skin” of the bamboo and don’t do much structural damage, but this surface is the strongest part or the culm, so if they’ve eaten away large chunks of it, or ring-barked it, be warned!

Cracks, scratches and splinters are also things to look out for. Remember this thing is going to be on a bike for a long time. Find the best bits you can!

What to do with cracked bamboo?

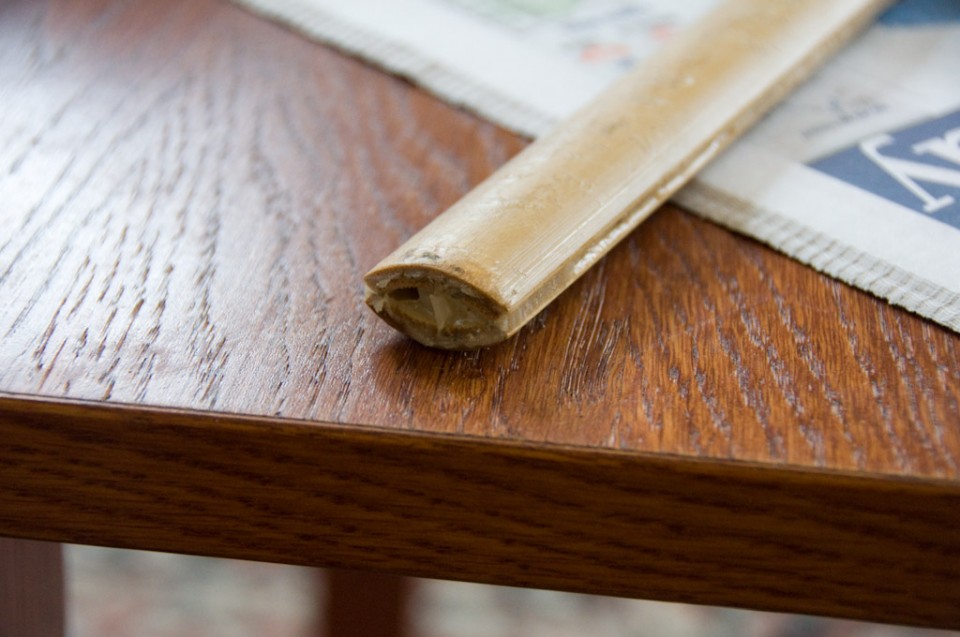
If you’ve read my previous post you’ll see I’ve cracked a few bits of bamboo.  Not wanting to throw them away I’ve made use of them by splitting them into two and then cutting them down further to form two less-than-semi-circle pieces that can then be glued together. I got the idea from Brendyn, another Melbourne bamboo bike maker, who’s done something like this in his latest build. Sweet stuff!

Below are some pics of what could be an oval shaped chain stay or seat stay. You can see in the first picture where the PVC tape I used to wrap it all up as the epoxy dried has left small amounts of epoxy behind. This would be sanded off later.

Next time I try this I’ll spend more time making sure the two pieces have bigger flat edges facing each other. Bigger area means more epoxy bonding area!

Heat treating bamboo

Over the course of the last few months I’ve heard a lot about the process for heat treating bamboo. People put it in ovens, attack it with butane torches, smoke it over fires or dry it out in kilns.

Why do they do it? The main reason is to rid the bamboo of any water content so it doesn’t contract or expand with temperatures as easily.  A secondary reason is the mottled burnt look kinda looks cool yeah?

Which method is best? I still don’t know. But here’s a few things I’ve picked up that might help.

Exploding bamboo

If you do plan on doing any of these heat treating methods you’ll need to puncture the nodes before heating. Failure to do so will cause a heat buildup in the pocket of air trapped between the nodes and eventually a big kaboom! I used a metal kebab skewer and hit it with the hammer to poke a small hole, but you could use a long drill bit, or a piece of metal rod etc. Try to maintain the integrity of the node as much as possible thou as they add strength to the pole!

Don’t heat treat dried bamboo

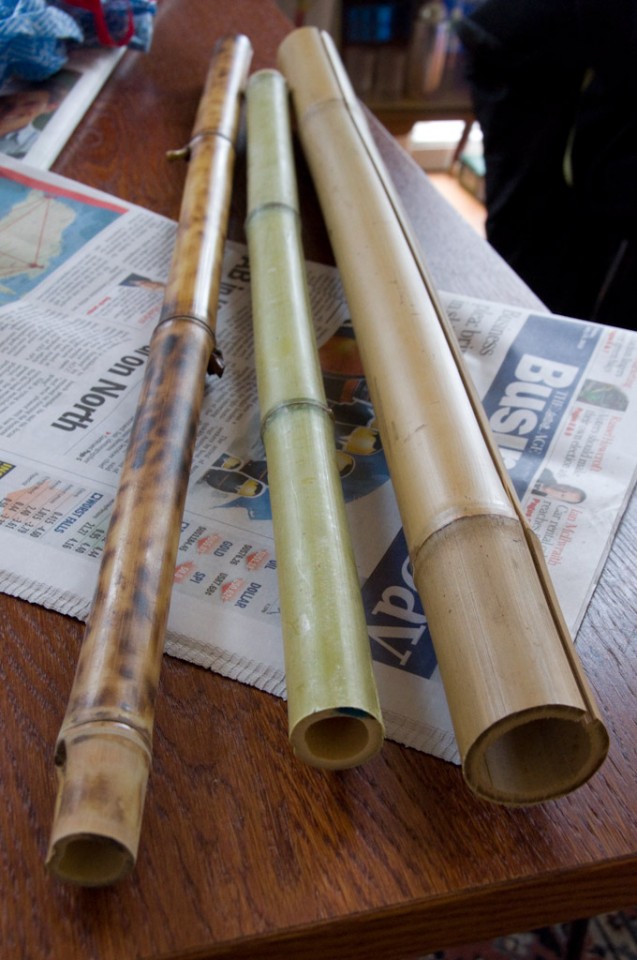
If your bamboo is imported from another country (ie. China), like the piece of Tonkin pictured on the right above, it’s probably been dried already. Putting it in a 150degree oven for a few hours will do nothing but make it brittle and crack! It doesn’t necessarily crack whilst in the oven, it’s more likely after you take it out and it cools down. Two pieces I tried cracked in the middle of the night, long after they’d cooled. Woke the house up! I tried leaving it in the oven as it slowly cooled down, but that didn’t help either. More cracking.

Raising the temperature to over 200 degrees just ended up burning the bamboo I tried. I haven’t got a pic of it, but it basically turns to black charcoal that’s very weak and easy to break. Not good.

Heat treat green bamboo

It’s kind of a logical conclusion, but I’ll explain it anyway. Green bamboo (A piece of green Aurea is pictured in the middle above) has lots of water in it, thou the older the culm the less water it has. You can put it in the oven and you’ll get most of the water out. You’ll see it steam out of the ends!

Waving a butane torch over the surface is a better way to go thou, as it not only gets rid of the water, but also the waxy surface of the bamboo gets burned off too. This is important if you’re planning on making epoxy stick to bamboo!  The piece of heat treated Aurea (pictured on the left above) used to be the same colour as the middle piece. Cool stuff.

I’ll see if I can record a video of the butane torch heat treating process, as it’s kinda good fun and fascinating to see the colours change. Bamboo’s like a chameleon!

Real science

If you’re after some real hard science about heat treating bamboo, check out this PDF about the subject in the field of making bamboo fishing rods. Long read!

Getting jiggy with it

I’ll stop the puns soon. I swear.

Built some standoffs for the headtube and rear end. Check em out:

The degree of accuracy of this jig is probably not within the tolerances of a well made bike, so I’ll have to resort to a lengthy process of alignment checking after the initial tack gluing. I’ve seen laser levels used with jigs to check alignment, so might go get one of them.

Enter the jig…

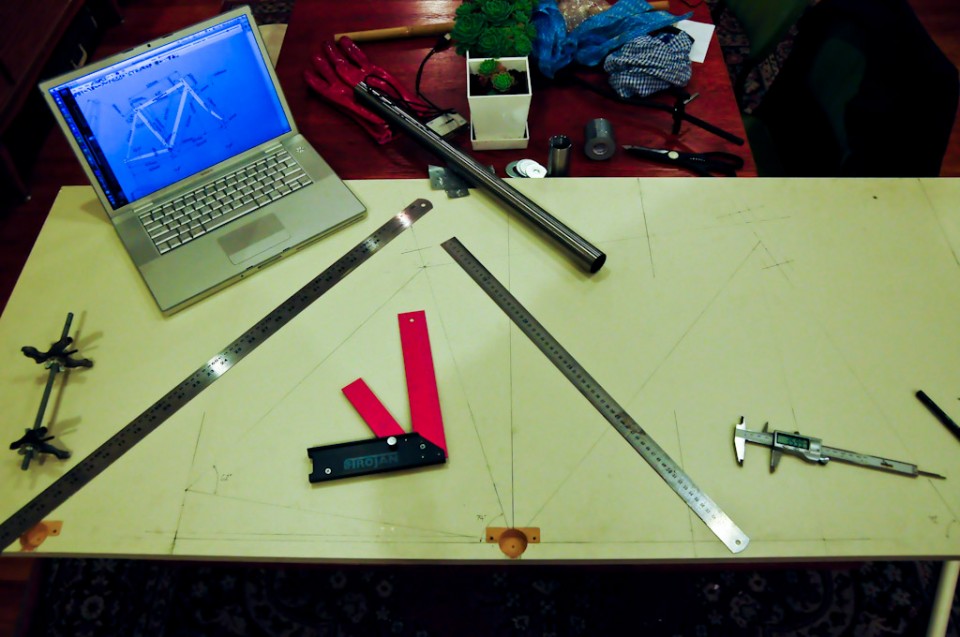
Started work today on a flat wooden jig that will hold the frame in place while I tack the joints and generally put it together.
I found an old cupboard door, which to my luck had 33mm holes drilled in it from where the hinges were. 33mm is the size of a bottom bracket ID, making it a perfect fit for the PVC tube which I’ll extend out to hold the BB in place.
I’ve drawn out the centrelines for the frame, to within 1-2% accuracy I’d say. I wonder how accurate I need to be?

Parts, parts, parts!

Just like the out of work actor Tobias Fünke mistakenly finding a Tractor Pull magazine (thinking it said Actor Pull) and seeing thousands of parts inside, I too became excited when the delivery man arrived today with my bike parts:

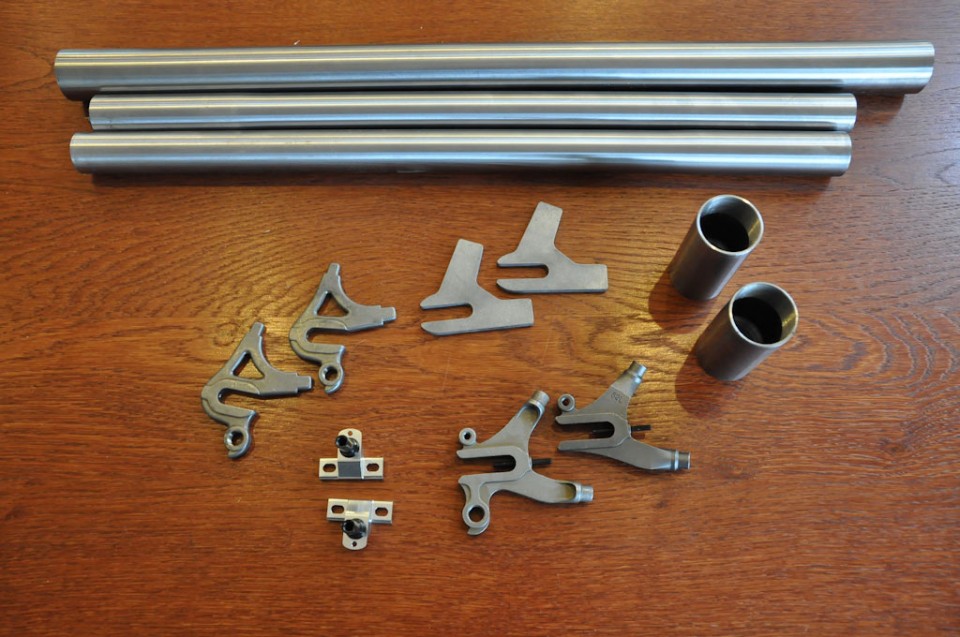
But what’s with all that steel tubing Mik? Aren’t these meant to be bamboo bikes? Fear not reader, as the tubes are only there for the bits bamboo can’t handle. The longest tube pictured will be cut down to make maybe three head tubes. The two smaller lengths are seat tube sleeves, which again will be cut down and inserted and glued into the bamboo seat tube so that a regular 27.2mm seat post can fit snugly and tight.

Also pictured are two 73mm bottom brackets, and three sets of dropouts of varying designs. Unfortunately for me they delivered two right-sided dropouts for one pair, so I’ll either have to bend some metal or order two left-sides now.

Finally are some cantilever brake braze ons, stolen from my steel mtb frame which doesn’t use them as it has disk brakes. I’m going to play around with finding out the best way to attach these suckers to the seat stays.

Bamboo Bicycle Stand

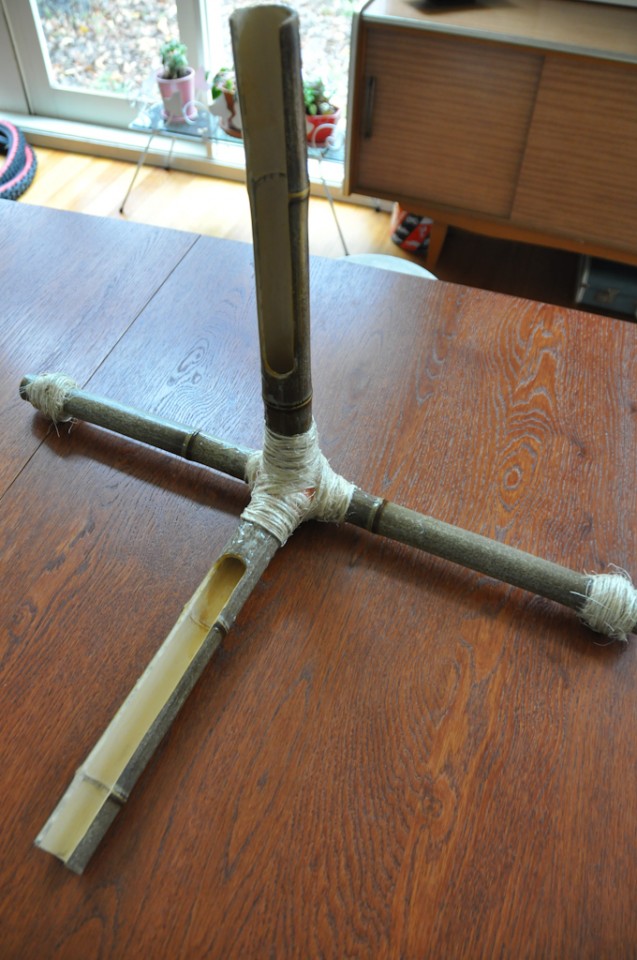
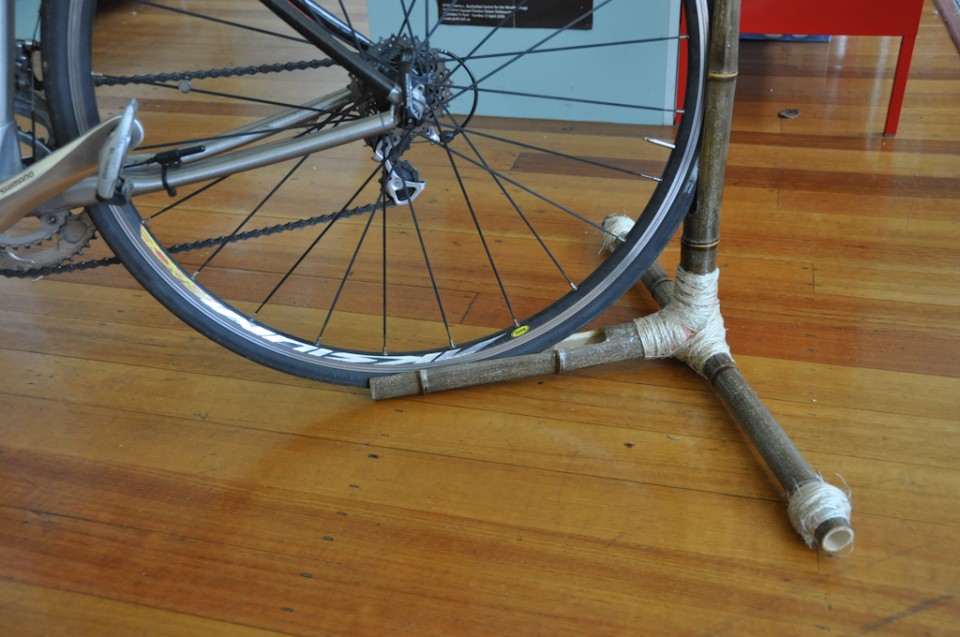
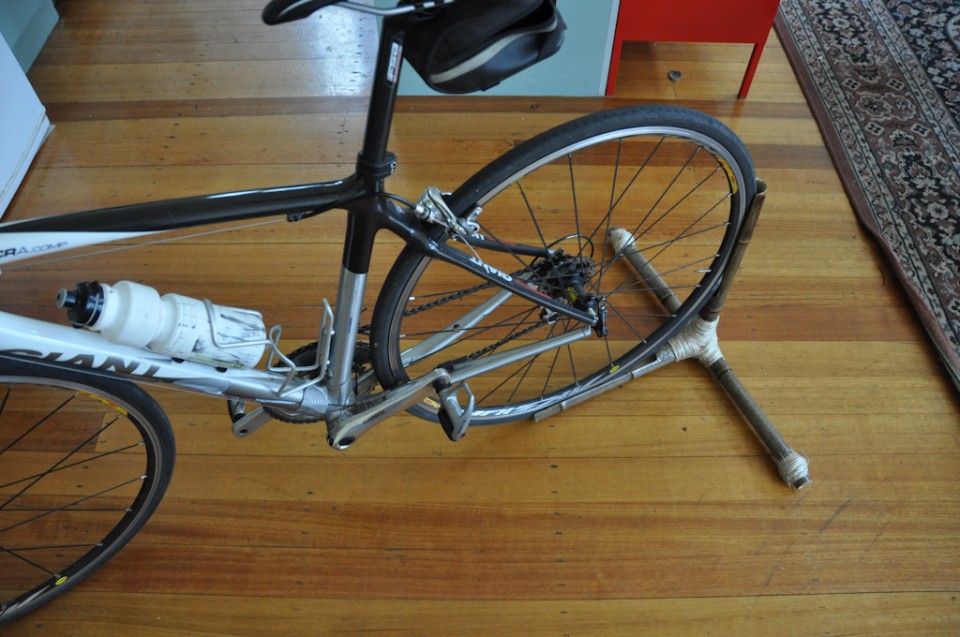
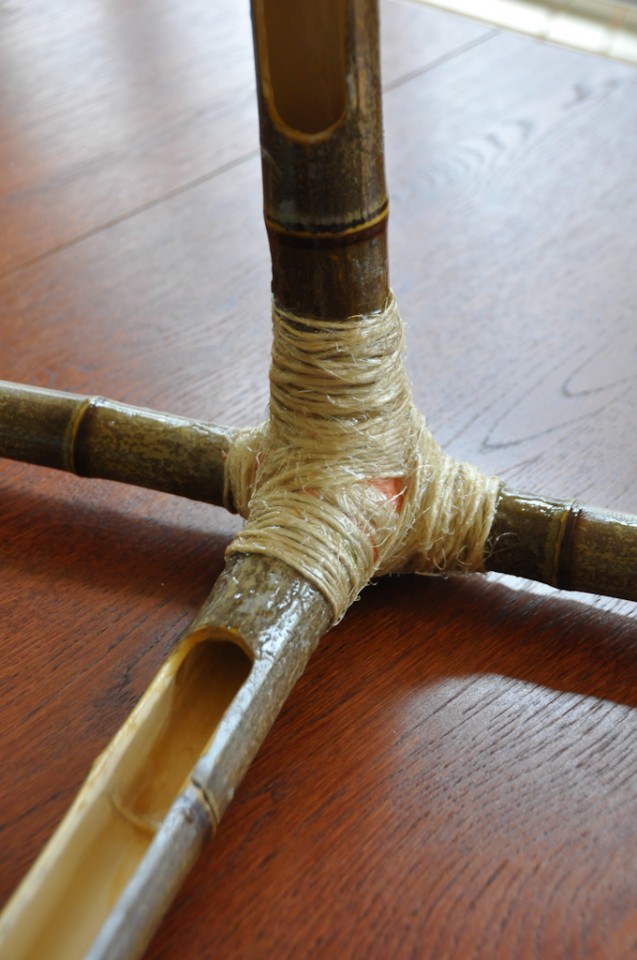
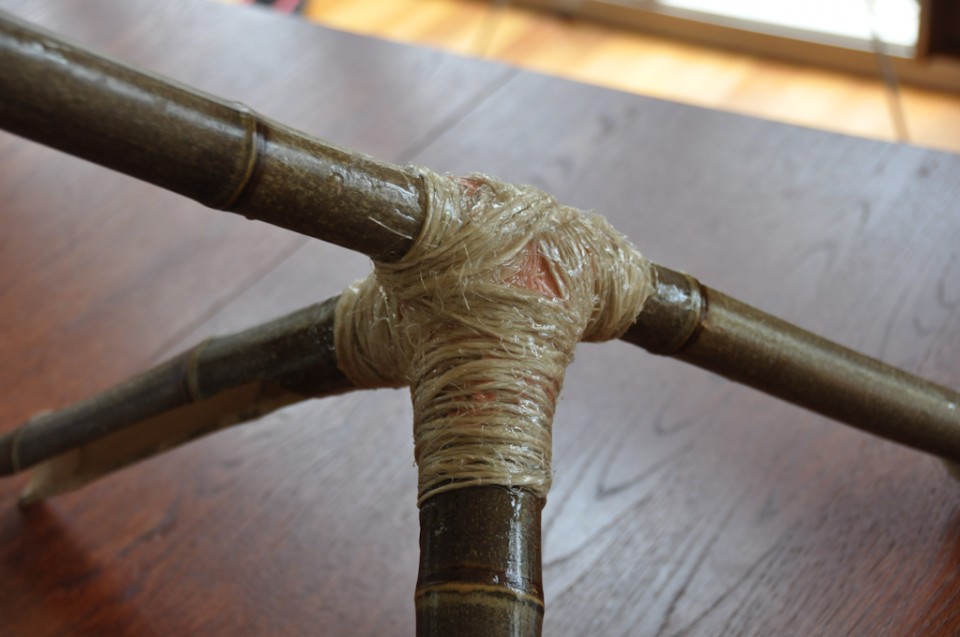
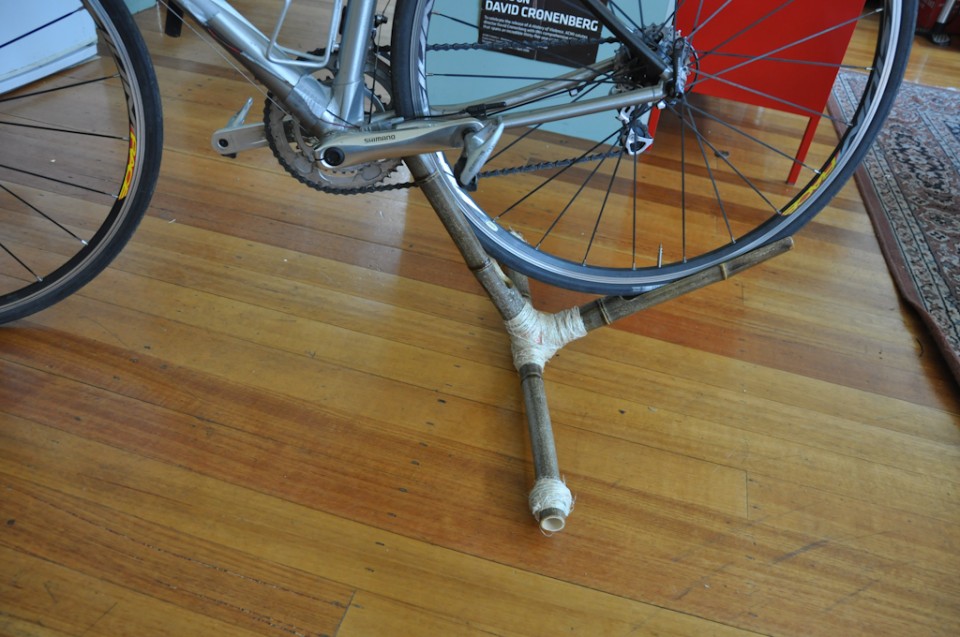
So the end product of my test composite joint making is a bamboo bike stand! Here she is:

I’ve designed it to exactly fit a 700C road wheel, but it could easily be made with wider slots for wider wheels.

The final joint ended up being 3 layers and I experimented with three different types of epoxy.
The first layer used fibreglass resin, the second was the pinkish builders bog you can just see poking through certain areas of the joint and the last was Glass Coat, which is a 1:1 ratio epoxy that’s used for tabletops, pottery etc.

I’ve decided not to sand back this last coat, as it’s nice and glossy and I like the raw look of the sisal twine.

The stand can also be cantilevered back. This is a slightly more stable position for it, but requires that the bamboo sits against the chain stays, so it wouldn’t work for all bikes.

Resin, sisal and bamboo test joint

While I’m still waiting on parts and hemp fibre to arrive I decided to have another go at making a composite joint with fibreglass resin, sisal twine and a 3-way bamboo mitred bamboo joint.

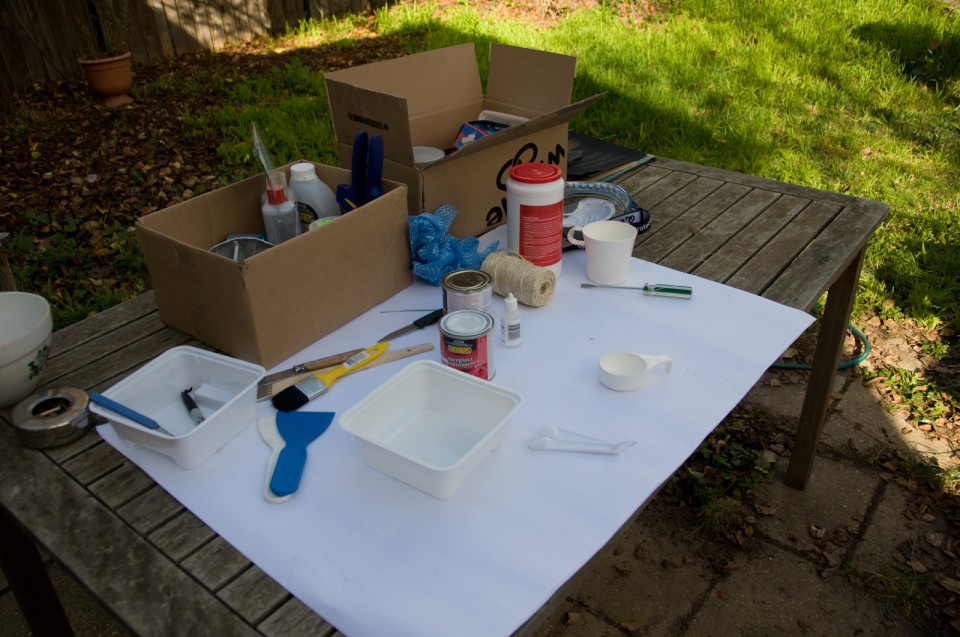
Here’s the workspace:

Here’s the initial binding of the sisal, with a coat of Timber Sealer applied (this stuff helps the epoxy resin stick to the wood):

Here’s the 2nd layer of sisal applied and it all drenched in epoxy:

It may not look too crash hot at the moment, but remember this is just the first layer. Once this is dry I’m going to use a more putty like builders epoxy to allow me to mould the shape of the join better.

UPDATE:

here’s the first layer sanded back, ready for the filler epoxy layer:

The makings of a cyclocross frame

I’ve recently decided to build a cyclocross frame for the first prototype. I figure if anything’s going to test out the durability of a frame it’ll be a cyclocross race. That and it’s the only sort of bike I don’t own that I’ve always wanted (apart from a recumbent, unicycle, downhill, fixie, penny farthing …).

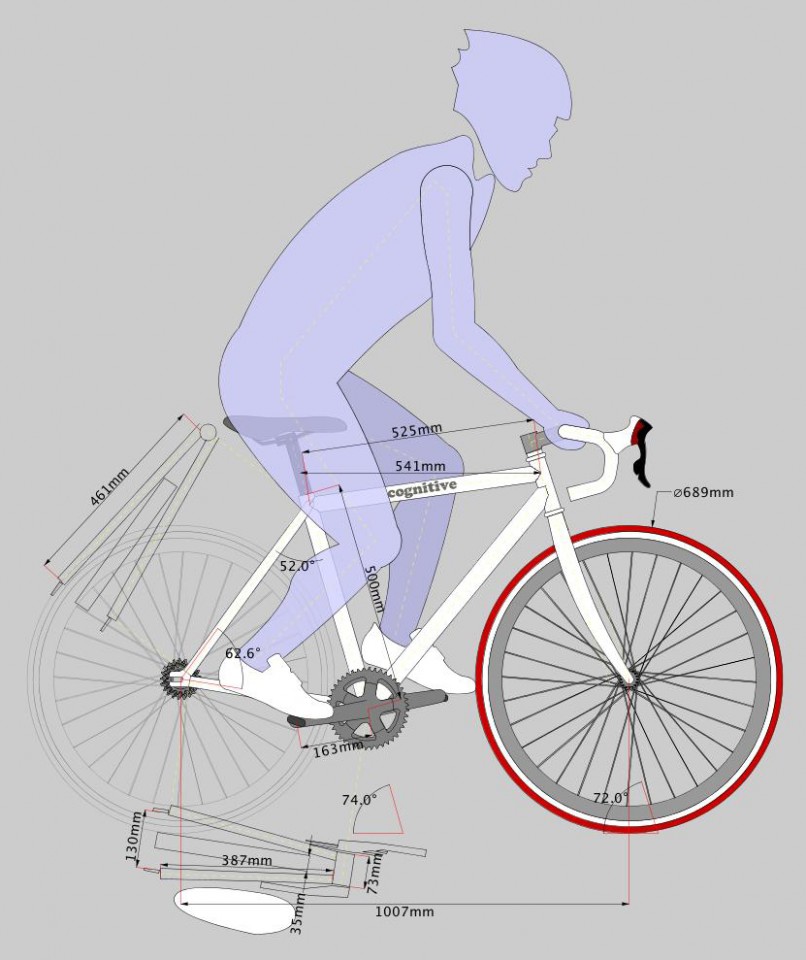
Here’s how it’s looking so far (ignore the colours, I just like designing in red/black/white):

As you can see there’s lots of angles, lengths and diameters to figure out. The BikeCAD above only is only showing the basic frame dimensions and angles, not any of the mitre lengths or tubing diameters.

The main issue to solve with using bamboo is tyre clearance for the chain and seat stays. I’m picturing that the diameter of this bamboo will be slightly larger than a steel/alu/carbon bike in order to get the greatest stiffness. To help overcome the larger than normal tube diameters I’m using a 73mm bottom bracket as well as a wider than normal seat stay attachment angle. If that doesn’t alleviate the problem I’ll try using skinnier bamboo, but fill it with expanding foam filler, which I’ve been told increases stiffness markedly.

The drop outs, bottom bracket, seat tube sleeve and head tube have all been ordered and are on their way. Soon it’ll be mitre time!